
Showing posts with label fabric. Show all posts
Showing posts with label fabric. Show all posts
Wednesday, February 5, 2014
X-Ray Cat Fabric Postcard


Tuesday, February 4, 2014
Fun fabrics


The fabrics are nice the way they are, but I know they can look better with a bit of added stitching and some shiny embroidery threads.

For this one, I outline stitched around the bars and around the mr. Goodbar writing.
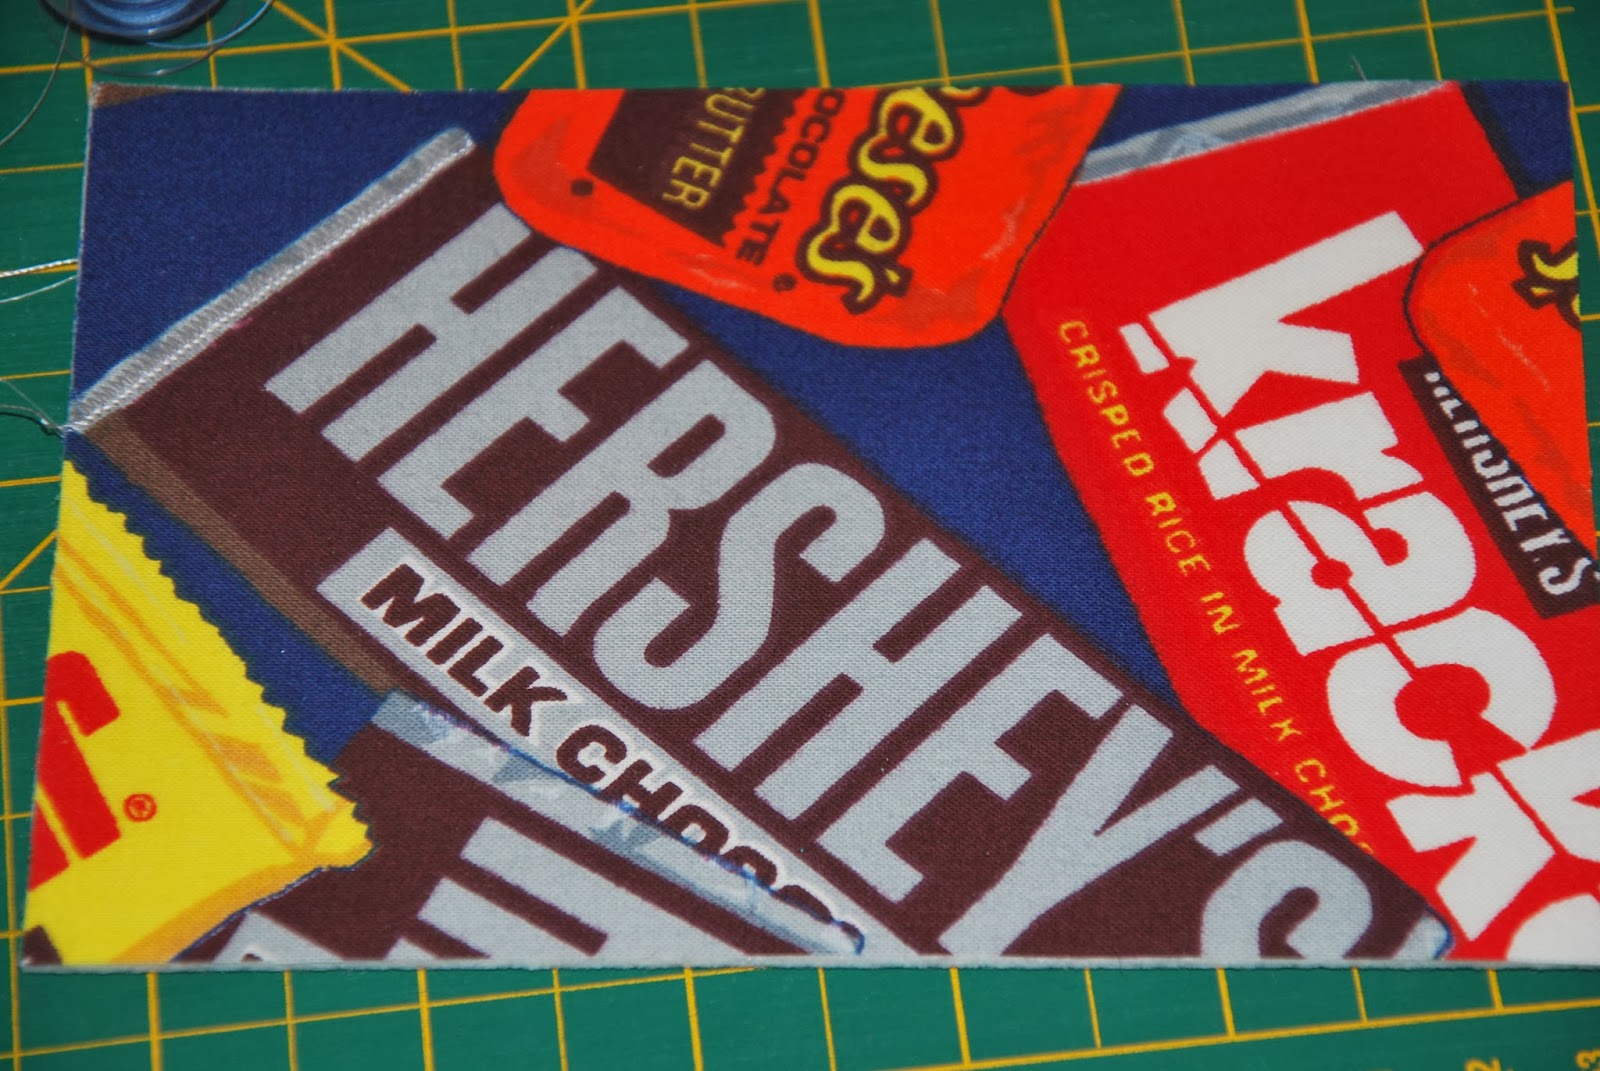
unembellished

Lots of top stitching. I used a grey embroidery thread to emphasize Hershey's. I started at the bottom of the H and continued across not cutting the threads between each letter, instead, I used a brown sharpie marker to colour the grey thread between letters. You can spot just a dot of grey between the bottom of the E and the R. This card has been mailed out to ?

I use an embroidery foot to free hand most of the stitching, for some of the longer straight lines I use the regular foot and the feed dogs to more the card.

This is such a nice print, that it really didn't need much. I used black thread to outline various aspects of the shoes and grey for the balls.

Years ago, I made a pillow case with this fabric.

I used some ideas from Zentangles to fill in the stars. Yellow, orange, green and red threads were used.

I was given a piece of this fabric that a friend had left from a quilt. it's shown up in a few of my craft items over the years.

I wanted to emphasis a few of the features. I used a thread painting technique to over stitch the heart, the alien, and the word love. I also re-embroidered around the word whatever. It used to be the bright blue that shows in the middle of the letter a.
Monday, February 3, 2014
Paisley Power
Paisleys are wonderful. There is so much you can do with them. One of my Zentangle friend's challenged a group of use to tangle some of them. Since it was a loosely defined challenge, I thought I would try and stitch mine. I wrote about it on my other blog, Books and Quilts. I'll also post the photos here.
 Most postcards I start right in on the stitching, but this required some pre-planning and a couple of sketches. Not all tangles can be done successfully on the sewing machine, but those continuous line ones work perfect.


Last year I cut fabrics for several floral quilt projects and had a bunch of equal size strips remaining. I sewed them together and set them aside. They worked perfect for the background for my first attempt. The black stitching barely shows up. I stitched on the fabric and the thick layer of interfacing. Since it already had the fusible on the back, I found it a bit difficult to manipulate and move smoothly. I'll have to try some other arrangements and see if I can an improve on that.
I was hoping that changing to pink thread would help with the visibility, but it didn't really work. A more drastic approach would be needed.
Pink fabric and black thread. Now it really shows up. This time I decided that I would use one tangle for the inside of the paisley. I'm happy with how this turned out.
I thought the stitching might be more visible taking the picture on an angle. As you can see in the next two photos, it did help a bit. A big advantage of these little projects is that if something doesn't work, I can still finish the project and quickly move along to the next variation.
Sunday, February 2, 2014
Postcards from pre-printed fabric panels

Today's set of postcards started with a purchased panel. Actually it was a width of fabric strip that I purchased for about $3.00. It was badly printed, skewed and printed right into the selvedge. It was also much smaller than a standard postcard size. |A bit of improvising would be needed.
There were also pieces for the back, but again, they were too small, so I set them aside for a future project.


Simply set with a strip of fabric on each side. I purposely set the panel off square so it would be obviously skewed. A little bit off square would make a viewer think I made a mistake, where as being off square by a larger margin looks as though it was done on purpose.

Really set off square.

To me, the words slanting downward is more pleasing, but I wonder if a right handed person would consider the words slanting upward more pleasing.

This time, I moved the panel to the top of the interfacing and added fabric to three sides. The bottom strip was trimmed from and earlier postcard.

A little more play, moved this panel to the upper right corner requiring only strips on two sides. Unfortunately when this one was designed, the paint for the working was a pale pink that hardly showed up. I used a Pigma pen and coloured it a darker pink. Very effective. Check the first photo in this post and you'll see the difference.
As part of "A Month of Letters", I'll be sending one of these cards to a quilting friend.
Wednesday, January 29, 2014
Four in One cards


The original two cards are shown on the left, and the ones I recently completed are on the right.
Saturday, January 25, 2014
Fabric Postcard Challenge. for 2014
Every now and then I have to shake things up and break out of my normal routine. This year I have challenged myself to stitch 350 fabric postcards. I have no idea if I'll be able to accomplish this lofty goal, but I am going to try.
For those who don't know what a fabric post card it, well, it's a post card made from fabric. It has fabric on the front, plainer fabric on the back where you write and place the stamp and a really stiff layer in the middle to keep it rigid in the mail. Yes, you put a regular postage stamp on it and send it through the mail. It's barely noticeable, but at the bottom of the first two postcards, are the bar code that the sorting machine prints .


For those who don't know what a fabric post card it, well, it's a post card made from fabric. It has fabric on the front, plainer fabric on the back where you write and place the stamp and a really stiff layer in the middle to keep it rigid in the mail. Yes, you put a regular postage stamp on it and send it through the mail. It's barely noticeable, but at the bottom of the first two postcards, are the bar code that the sorting machine prints .
This next photos is the back of a card that went through the mail as well.
I hope that you'll join with me to view my journey through the rest of the year as I explore the making of all sorts of fabric postcards. And to keep you coming back, I'm letting you know that I'll be holding the occasional contest to have one of them mailed to you.
Tuesday, May 7, 2013
Angels in the Mail
These two postcards were made by my mother and were sent to the winner of one of my contests. They went directly in the mail with a stamp attached to the back. If you are wondering how they fared, then visit with Roslyn at Ros the Quilter and take a close look. They are mostly unmarked. The second card has a band of orange code marks along the bottom, but I think that add character.
Both cards measure 4 x 6 inches.


Friday, April 26, 2013
For a Special Person
I was playing around at my sewing machine today with a fun piece of fabric. A few shiny threads and lots of free motion stitching and I came up with this postcard. Will be sending it off to one of my favourite people.

 Am linking up with Beth at the Best Hearts are Crunchy for Postcard FriendShip Friday.

It is hard to tell, but there is a lot of pink and beige stitching that reminds me of contour lines.
Am linking up with Beth at the Best Hearts are Crunchy for Postcard FriendShip Friday.Thursday, April 25, 2013
To Russia with Love

A few days ago I sent this card off to a Postcrosser in Russia.
Measures 4 x 6 inches.
Cotton fabric in the Flying Geese motif.
I did ask the recipient if she would like a hand made card and fortunately she said yet.
Tuesday, April 23, 2013
I held a contest on my other blog a while back. One of the prizes was a fabric postcard made by me. I can finally show you the picture as it has been received by the winner. It measures 4 x 6 inches. Yes, it really was mailed just as it is. The winner told me that she likes bright, and I was able to find a few fabrics that met that requirement.

These are such fun to make as I work with what ever fabric is at hand. I usually add some of the fun stitches from my sewing machine. I never know what it will look like, but I sure do enjoy the process.
Tuesday, April 16, 2013
A Quilting misjudgement leads to a Great Postcard
Recently my mom and I have been playing with the disappearing 4 patch quilt technique. This post card is a result of that process. She felt that the one part was cut too narrow and it didn't make for a nice quilt block. Once she trimmed it up and fused it to some interfacing, it makes a wonderful postcard. Lucky for me, I was the recipient. The technique she tried is illustrated in this post from my quilting blog.
The colours are a bit off, it should be more yellow and purple. Measures 4 x 6 inches.


This is the quilt top that I made using the same technique. Details are shown in the post linked to above.
Friday, February 1, 2013
A Mother's Love
While my mother was coping with dad's illness and his subsequent passing, she embroidered dozens of fabric postcards. Quite a few were sent as thank-yous to the many people who helped my parents during the course of dad's illness.
As Christmas came around, she was still stitching. This is the one that she hand delivered to me mid December. I think that it is absolutely gorgeous and will be keeping it out on display for quite a while yet.

 I will be linking up with Postcard friendship Friday at The Best Hearts are Crunchy.
As Christmas came around, she was still stitching. This is the one that she hand delivered to me mid December. I think that it is absolutely gorgeous and will be keeping it out on display for quite a while yet.
 I will be linking up with Postcard friendship Friday at The Best Hearts are Crunchy.
 Tuesday, February 28, 2012
Fabric Postcards ready to Mail

In between my bigger sewing projects I have been working on a few fabric postcards. They are all made with trimming from when I was cutting pieces for my quilt. I plan to send these to authors whose books I particularly enjoyed reading.

Thursday, February 23, 2012
A Happy Mailbox

Sunday, February 19, 2012
Sisters

My sister Heather who shares this blog made me this postcard special for me as you can see that she added Best SISTER Friends! It was a treat to find in my mailbox.
Both my mom and sister are very creative when it comes to making things.
It made me smile to find this in my mail box and to put by my computer. Just the phrase "WHATEVER" seemed appropriate at this time in my life.
Thursday, February 9, 2012
Valentines

I found these cards on a table one day on my walk to the library so I picked up a few. They are advertising for something, but they are also cute and were perfect to send this week. So there are a few on there way to some people I love. I hope they "FEEL the LOVE" when they open their mailboxes.
Friday, December 2, 2011
Post Card Friendship Friday - Pixies Rule

This is the second lovely pixie that my mother has made for me. This darling was hand delivered.
I have shown her sibling earlier, but I wanted to show the together. Perhaps there is a triplet?


Subscribe to:
Posts (Atom)